Category Archives: Anywhere

Main menu and calendar heading in new design

By clicking the now more prominent main menu button, the menu items appear as icons to make better use of space on smartphones:

If there are important notes, the main menu button will turn red:

On large screens, “Tasks” and “Reports” are accessible directly from the main menu bar:

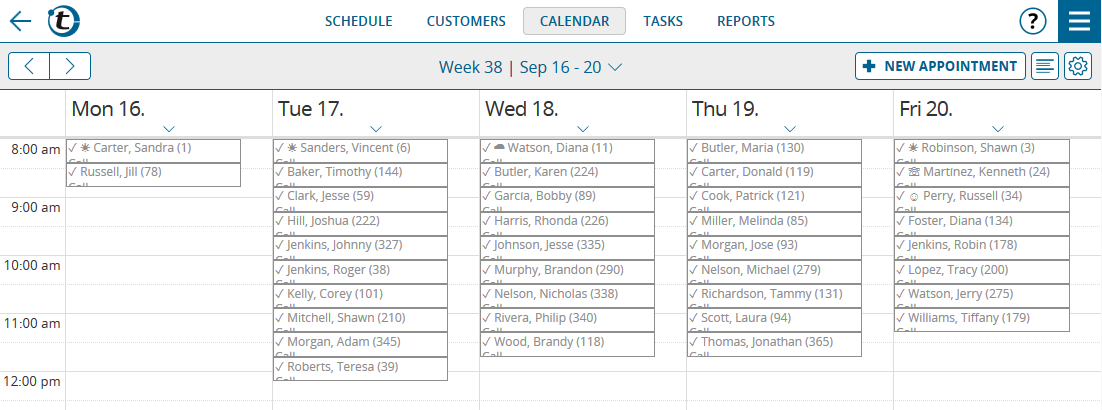
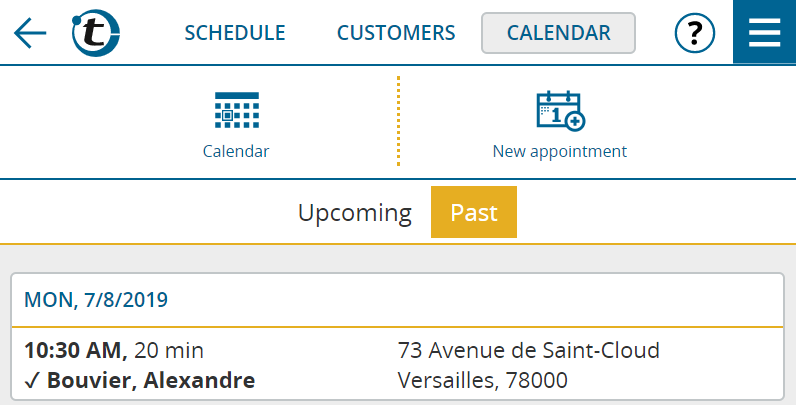
The original main menu entry “Appointments” has been renamed to “Calendar”, because the calendar view has been extended by new functions over time and now also shows call suggestions, reports and tasks besides appointments.

The “Calendar” entry in the main menu now always opens the calendar view. To get to the list view of appointments, click the list button in the calendar.

The day headings of the calendar have a new design. The labels appear in a larger font, the reference to the map and the presence of tasks are represented by symbols. The small arrow pointing downwards indicates that a menu will open with a click.

In addition to the already familiar link to the map, this menu also contains a new link to the schedule for the day and new functions for task management.

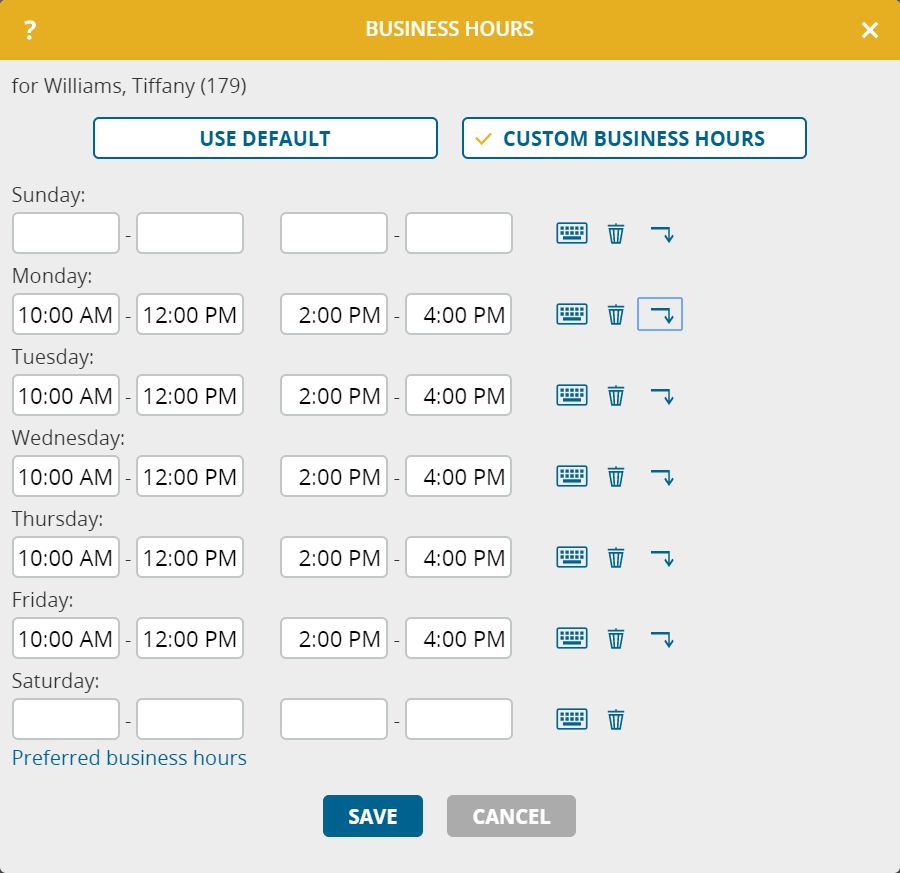
Furthermore, for a better overview in the weekly and monthly calendar, only those weekdays are displayed that are scheduled for visits according to the working hours set in the options. If an appointment is entered on a day off, this day is also displayed in the calendar.

Task management in portatour®

This function was requested by many users. Now it is available: A task management directly integrated in portatour®.

Use tasks in portatour® to manage your to-do list. This will clear your head while you still remember your tasks. Post-it notes are now a thing of the past.

Here are some use cases that you can cover with tasks in portatour®:

  • “Create a quote for customer ACME Inc.on Friday.” A task with date and reference to a customer.
  • “Call customer John Doe every Wednesday and, if necessary, take order, since customer is on the truck delivery tour for Thursday”. A recurring task with customer reference.
  • “Fill in the questionnaire X at the next visit of customer Jane Doe.” A task with customer reference, but without concrete date.
  • “Create my expense report for the previous month every 1st of the month.” A recurring task without customer reference.

The task list for creating and completing tasks

In the main menu you will reach the new Task List by clicking “Tasks“.

You create a new task using the buttons “New task” or “New task for customer”, depending on whether the task refers to a customer or not.

Enter the subject of the task, e.g., “Create quote”, then select the desired date and optionally enter a note. Click save. Voilá, the first task has been created.

You can now find the task in the task list under the heading “Open”. The tasks that still have to be completed are sorted there by date. Overdue tasks whose date has already passed are displayed in red at the top.

By clicking the task you can edit, delete or mark the task as completed. You can complete a task even faster by clicking the check mark on the right.

Optionally, you can create a report when completing tasks. This report can also be viewed as “Other report” on the customer detail page, provided that the task had a customer reference.

Completed tasks can be found in the task list, now under the heading “Completed”. After 90 days they will be deleted automatically.

Special Features of Tasks

  • Recurring tasks: When creating a task, it can be created as a series of repetitive tasks, e.g. every week on Wednesday. They can be configured and edited in the same way as recurring appointments.
  • Tasks that expire automatically: If the field “Completion” of a task is changed from “Required” to “Optional”, this task expires automatically if it has not been completed by the configured date. Instead of being displayed as a red overdue task in the task list, it automatically moves to the category “Expired” and is deleted after 90 days.
    Hint: A task should be set to “optional” if completing it no longer makes sense after the set date; or in the case of recurring tasks if it can wait until the next occurrence of the task. This way, you avoid overdue tasks accumulating unnecessarily.
  • Tasks without date: If you set a task to “Without date”, the task is no longer displayed in the list under “Open”, but in its own category “Without date”. The task will never become overdue or expire. It can be completed at any time. For example, if the task has a customer reference, you could interpret it as “to complete at next customer call”.
  • Custom fields: Similar to reports and appointments, the input masks of tasks can be extended by up to 100 custom fields to cover your needs. As usual, this customization can be done by you or your administrator in the options under “Custom fields > Tasks”.
  • Reports on completed tasks: The decision whether reports on completed tasks can or should be created is similar to the decision over call reports and can be configured in the options under “Reporting > Reports for tasks”.

Tasks on the customer detail page

If there are tasks for a customer that still need to be completed, they are also displayed directly on the customer detail page in the new section “Tasks”. By clicking the task, you can edit, delete or mark them as completed. The “New task” button creates a new task that automatically refers to this customer.

Tasks in the calendar

If tasks are to be completed on a certain day, this is indicated in the calendar by the task symbol for the respective day. To view all tasks of the day, click the day heading. A menu appears with the entry “X Tasks”, X representing the number of tasks. If you click it, the tasks of this day are displayed in a window.

In the calendar, click the day heading, and then select “New Task” to create a task for that day.

Tasks in the schedule

If there are tasks to complete on the day displayed, a yellow row is shown at the top of the schedule. Click it to see the day’s task list.

Technical notes on tasks

  • Tasks have no influence on the automatic route planning of portatour®. I.e., tasks are completely separated from call suggestions, appointments, reservations, call blocks, the last call date or the call interval of a customer.
  • It is possible to create up to 3,000 tasks per user in portatour® . Recurring tasks will be created one year in advance, just as recurring appointments.
  • The import and export of tasks works the same as for appointments or reports via the user interface under Options > Import data or Export data. It is also possible via the API.
  • The export of tasks is also available via OData in Excel.
  • If you transfer customers between user accounts via the user interface, associated tasks can optionally also be transferred. When importing customers via the API, the new parameter “transferIncludesTasks” must be added for the automatic transfer of tasks.
  • For company accounts (2 user accounts or more), you can specify whether tasks may be deleted under Options > Permissions.
  • The task management is not available in the offline mode of portatour®.
  • The task management is currently not available if you use portatour® Anywhere in connection with Salesforce or Dynamics CRM.


Filtering of customers using an external list

Imagine you as a portatour® user are facing the following challenge:

Your marketing department sends you a list of 50 customers from your territory. Due to an important one-off campaign, you are supposed to visit those customers as soon as possible, regardless of their call interval.

In order to schedule these customers quickly and efficiently, you can use reservations in portatour®. To avoid having to search for these 50 customers and include them in the schedule individually, we have developed a new function: filtering of customers using an external list.

This works under the following conditions: you receive the list in electronic form from your marketing department; the list contains a field that can identify the customers (e. g. the customer number); each value has its own row. To give an example, the following list of customer numbers would be suitable.

23054
23078
24102
24506
etc.

Proceed as follows:

In the main menu, click “Customers”, scroll all the way down, and click “Edit All X“. You are now on the mass editing page for all your customers. Since you do not want to make a reservation for all your customers, but only for a specific group, click the new link “Filter using external list“. The following window appears:

In the input box “Field”, select the customer data that the list of your marketing department contains. Usually, it is either “Customer Number.”, “External ID” or “Name”.

Then, by using the clipboard, select & copy the list; either a column in Excel or the values from an email. Paste it into the “Values” field. Then, click “Filter“.

If suitable customers are found, the selected customers will automatically be reduced to these customers. Take a look at the number of customers; in this case it should be 50. Then click the “Include all in schedule” button and update the schedule.

Voilá. The marketing department will be satisfied.

Technical information:

  • If the list refers to customers that are not in your portatour® customer database, these customers will be ignored. This way, is not necessary that your marketing department creates a separate list for each sales representative during a campaign, but can send the entire customer number list to each sales representative (hint: as long as the size of the list is manageable).
  • If no matching customer is found for any of the values, you will receive an error message. You may have selected the wrong data field for filtering.


Increased API usage limits

Note: The following article is primarily intended for portatour® administrators of company accounts (2 or more users) who use or wish to use the API for automatic data import/export.

API calls usually transfer large amounts of data (e.g. complete customer lists of users), which causes CPU & database load on our servers and requires storage space for transaction logs. Therefore, API usage is limited to provide a high quality of service to all customers.

With today’s update, the limit has been doubled, i.e. from 25 to 50 API calls per user account within 24 hours.

Additionally, you can increase the API limit to 250 calls while developing your interface connection, because during the development, evaluating and testing is usually done with higher frequency. You can increase the limit on the API documentation page (Options > API) up to 10 times for 24 hours each in portatour® at the push of a button.

Please find some hints for how to adhere to the limits during running operation as follows:

  • If you use the API to synchronize data automatically several times a day, simply restrict the synchronization process to the working hours of the employees, e.g. 7 AM to 7 PM. This already allows you to double the synchronization frequency within these 12 hours.
  • If necessary, synchronize the respective data entities (users, customers, appointments, tasks, reports) in different frequencies or check which direction is actually required at what time (import vs. export).
  • Reduce the frequency of the automatic synchronization. Instead, you could offer your employees the possibility to synchronize manually for themselves if they need the current data status. All portatour® API calls are possible in the context of a single user.

Upgrade to 3,000 customers per user

Good news for all those who need more than the previous maximum of 1,000 customers per user: Since last week’s update, the limit of customers that can be stored in portatour® has been increased to 3,000 per user.

However, a few restrictions apply:

For technical reasons, a maximum of 1,000 of the 3,000 customers may continue to have a call interval. To import more than 1,000 customers, it is necessary that your import file already contains a column with the call interval. This should have a value 0 (meaning “None”) for customers that you do not visit regularly. However, you can include these customers in the schedule by making a reservation or an appointment.

Increasing the limit is therefore primarily suitable for managing additional customers that you do not visit regularly but rather only on an as-needed basis. Some applications:

  • Small customers that you mainly look after by telephone
  • Prospects/leads for which you add a call interval to after converting them to customers
  • Customers you only visit as part of campaigns

Tip: For reasons of clarity when using portatour®, e.g. when searching for customers or viewing them on the map, we recommend that, despite the higher limit, you continue to import only those customers that you actually visit or that you want to visit in the near future.

Other restrictions:

  • On low-performance devices, displaying thousands of customers on the map can cause noticeable delays in screen output.
  • If you have saved more than 1,000 customers in portatour®, schedule calculation can take several seconds longer, as the internal “travel time matrix”, which holds a maximum of 1,000 customers, first has to be updated for the desired customers.
  • If you have saved more than 1,000 customers in portatour®, the “Find suitable day” function in the customer detail page, as well as the detection of appointment collisions in the calendar, cannot be used or can only be used to a limited extent for customers without a call interval, since in such cases, they are based on travel time estimates using beelines.
  • If you use portatour® in combination with Salesforce or Dynamics CRM, the limit is still 1,000 customers per user for synchronization reasons.

New maps 2018

We have just updated the map data and traffic flow data on our servers.

Changes in the road network and driving speeds may affect driving times between customers, so we recalculated them for you in portatour®. Some users might notice the change, when updating the schedule for the next time.

Improved Calendar: displaying of trips, breaks and overnight stays

With today’s update of portatour®, the calendar has been enhanced with new information and functions. Read on to learn how you can make the most of the resulting new opportunities.

Reminder: You can access the calendar by clicking “Appointments” in the main menu. If the appointment list appears instead of the calendar, click the Calendar button at the top.

Displaying of trips and breaks

In the calendar’s daily and weekly views, you can see at a glance which times are already scheduled for trips or breaks between customer visits.

Trips are represented by grey roads and lunch breaks with a fork-and-knife symbol. A white surface can be seen instead of the roads for times that have not been allocated – e.g. waiting times before fixed appointments.

Note: In the month view, roads and breaks are not displayed due to size constraints. If necessary, change the view using the cogwheel icon at the top right. You can find your personal lunch break settings in the portatour® Options under “Work Break”.

Displaying of overnight stays

Until now, only the overnight stays for which you explicitly created an appointment were visible in the portatour® Calendar. As of today’s update, you also see the overnight stays that portatour® suggests. These are recognizable by the grey entries at the beginning and end of the day.

In most cases, these will be overnight stays at your home location. However, if you have allowed overnight stays away from home, these entries can also be overnight stays at a “preferred accommodation” or at another location that portatour® suggests with regard to route optimization.

Note: Enable the automatic scheduling of overnight stays in the portatour® Options under “Overnight Stay on the Way”. You can manage your favorite places (e.g. favorite hotels) in the navigation menu under “My Places”.

Changing working times for a single day

The start and end times of the suggestions for overnight stays in the calendar correspond to your working hours, which are set in the portatour® Options.

If you wish to change your working hours on an exceptional basis for a single day, for example, because you want to start early and arrive back home earlier as well, you can achieve this in the calendar by simply moving the overnight stay at the beginning or end of the day to an earlier time. Use the drag and drop functionality, i.e. press, move and release the calendar entry to the desired time. You are then prompted to confirm.

The suggestion for an overnight stay is converted into a fixed appointment, which is colored dark blue in the calendar, as usual. Update the schedule by clicking the red update icon at the top left so the changed working time is scheduled accordingly.

Note: As an alternative to drag and drop, click the overnight stay suggestion, then select “Convert to Appt. & Edit”, and just enter the changed time in the appointment window.

Changing the location of an overnight stay

To change the location of the overnight stay for a given day, for example, because you booked a hotel, click the respective overnight stay in the calendar and then select “Change Overnight Stay Location”.

Another menu appears, where you select an address from “My Places”, or your home location, or a manually entered address.

After selecting the new overnight location, the appointment window opens, where you can optionally adjust the respective times. Upon saving the appointment, the previous overnight suggestion in the calendar is replaced. An update of the schedule is necessary so the changed accommodation is scheduled accordingly.

Note: If no schedule is available for a future day in the calendar, create an overnight stay by clicking the day and selecting “Overnight Stay”.

Fixing an overnight stay suggestion

If you want to fix a suggestion for an overnight stay so that it will not change during subsequent schedule updates, click the overnight stay in the calendar and select “Convert to Appointment”. It is not necessary to update the schedule.

Use this option if, for example, you book a hotel that portatour® has proposed on its own using one of your “Preferred Accommodations”.

Other scheduling options …

The three menu items “Convert to Appt. & Edit”, “Change Overnight Stay Location” and “Convert to Appointment” can also be found in the schedule by clicking the departure and arrival entries on days in the future.

We hope these new functions will make your daily work with poratour® even more pleasant and efficient. Our development team welcomes your feedback at feedback@portatour.com .

API sends e-mail notifications when errors occur

Note: The following article is intended primarily for portatour® administrators of company accounts (2 or more users).

We at portatour® are very pleased that many companies use the portatour® Anywhere API to automatically import and export their data on a regular basis.

However, in the course of logfile analyses, we have found that in some cases, that the root causes of faulty API calls are not resolved. This means that the same faulty calls are tried again and again day in and day out.

Due to these errors, which are often due to data inconsistencies in the import file, the API calls fail altogether. The field rep does not receive current data. Often the problem is only identified and remedied days or weeks later, after end users complain.

Today’s update of the portatour® API helps you to quickly detect and solve such errors before users are affected.

If an API call fails, portatour® now automatically sends an e-mail with an exact call and error description to the e-mail address of the administrator account whose credentials were used for the API call. As an administrator, you can promptly begin to remedy the cause. It is important to ensure that the administrator account you are using has the correct e-mail address and that mails sent to that account are also regularly read.

Note: To avoid generating a flood of e-mails for errors that involve many user accounts and therefore many API calls, automatic e-mail delivery is always delayed for at least one minute after a faulty API call. If further faulty API calls happen during this minute, all error messages are combined into a single e-mail and the delivery is delayed further. Therefore, there is no need to be surprised when e-mails always arrive at least one minute later in your mailbox in the event of an error.

At this point, we would like to offer you some reassurance: it is usually a matter of special cases in the data or in the process that were still unknown during the initial programming of the data synchronization via the API or in your program code. The API calls should subsequently go through without errors on an ongoing basis.

Automatic e-mail delivery for errors cannot be deactivated. Fixing the cause of any errors should always be a high priority, otherwise API calls will fail in any event.

Note however that while the e-mail notifications cover many of the possible automation errors, they are not all-encompassing. For example, in the following two problem scenarios, portatour® does not send an e-mail:

  • If you use invalid administrator credentials (username + password) in the API call, portatour® cannot identify your e-mail address.
  • If there is an error in a preprocessing step on your side and the program flow does not reach the actual API call.

If you need any assistance with API usage, we are happy to provide you an individualized workshop.

Optional geotagging for call reports

If you already have photos on your smartphone, you probably know what “geotagging” means: The photo is saved with the location where the photo was taken. You can search for photos more quickly and have them displayed on a map.

As of today’s portatour® update, geotagging of call reports is now possible on demand, i.e. portatour® can optionally store where the report was entered. You can use this functionality to show your employer, without any additional effort, that you were indeed at the customer’s premises. Geotagging helps with documentation for tax-free allowances (per diems) and is also used to avoid mistakes, since you would see if a report is about to be entered for the wrong customer.

The only prerequisite is that you always create the report immediately after the customer visit, i.e. while you are still geographically close.

Activating the geotagging functionality

By default, geotagging is deactivated. To use the function, it must be activated in the Options under Reporting. In the Geotags selection box, switch the setting from “Disabled” to “Add optionally” or “Add automatically”. As with most options in portatour®, a default value can be set for the company account and changed individually on a per-user basis.

Creating a geotagged call report

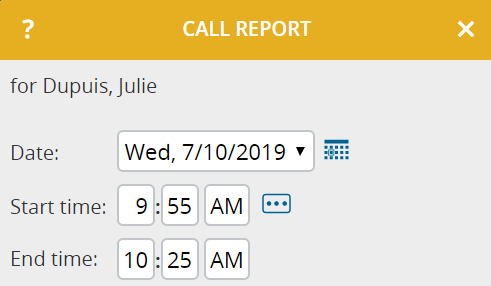
If you have configured the setting to  “Add automatically” in the options, when you create a new call report, for example by clicking “Called Now” while still at the customer, your location is automatically determined and added as a geotag to the report. Your device typically takes 1 to 10 seconds to find your location. You can already start filling in the report during this time. The geotag is shown in the report form below:

You can find the following information in the geotag:

  • Distance from your location to the customer visited or appointment attended as a beeline calculation. This value shows how far away you are from the actual address visited when you create the report. The address visited appears in the report directly above the geotag.
    Values up to several hundred meters are perfectly normal, e.g. due to large company premises, a distant parking space, any inaccuracy in the geocoding of the customer address or in the determination of the location.
    If the distance is significantly greater, this can be a warning sign that you are not entering the report for the right customer!
  • Accuracy of the found location. The location is determined by your device, and accuracy can vary due to technologies used and any signal hinderances. The actual distance should be considered in relative terms with regard to the precision of the geotag. If the accuracy is too imprecise, you can use the “Update” button to launch a new determination of the location.
  • Address of your location. Keep in mind that the street and building number will rarely coincide exactly with the visited address. Small distances or inaccuracies can easily lead to a crossroad, parallel street or to another building number.

If you have set the option to “Add optionally”, the geotagging is not automatically launched when the report is created. It takes a click on the “Add” button for the geotag to be appended to the call report.

A call report can only be geotagged at the time of report creation. It is not possible to subsequently add, change or delete a geotag in a call report.

Tip: If you have little time immediately after the customer visit, we recommend immediately creating and saving the call report . This only takes a few seconds and also works in offline mode. Later, you can enter any missing information (e.g. notes), in the evening. This procedure ensures accurate times and geotags in the reports, allows you to update the schedule at any time, since portatour® has registered all the completed visits, and also prevents you from forgetting to enter reports.

The location function must be enabled for your device to find your location. Furthermore, you have to instruct the web browser to allow portatour® to actually use it. If there are problems finding your location, you will receive an error message after 30 seconds, at the latest, which will be stored in the geotag of the call report. For troubleshooting, contact your device support.

Displaying call reports with geotags

Geotags are displayed in three places in portatour®:

  • In portatour® Anywhere: When you open a call report for editing, the geotag is displayed but cannot be edited.
  • In the portatour® Report: If in the Options, under Reporting, in the section “portatour® Reports”, you set Geotags to “Show”, the geotags for the last 7 days are also displayed in the portatour® Report. A default value for this setting can be configured both company-wide and individually modified on a per-user basis.
  • In an Excel/CSV-Export of the call reports: There are new columns that contain the geotag information detailed above.

Additional information regarding geotagging

  • Geotags are only available for “Called Now” and “Missed” reports. No geotags can be assigned for other report types (Clock In, Clock Out, Day Off, Other).
  • Users must validate and save each geotag on their own. For this reason, geotags are not available for automatically generated reports, i.e. if in the Options, under Reporting, Report Creation is set to “Create automatically”, then geotagging is disabled.
  • For call reports entered in offline mode, only the distance and accuracy are displayed in the geotag. To determine the address, an online connection is required; the address will be completed once the report is subsequently uploaded to the server.
  • If you are running portatour® Anywhere in combination with a host system (Salesforce, Dynamics CRM), geotagging is not yet possible.

Tips & tricks for planning flights

Before today’s update of portatour®, it was not possible to plan long-haul flights in portatour®. The reason for this was that portatour® always checks whether it is possible to drive the route between two appointments by car, which is seldom possible when routes are actually being travelled by plane.

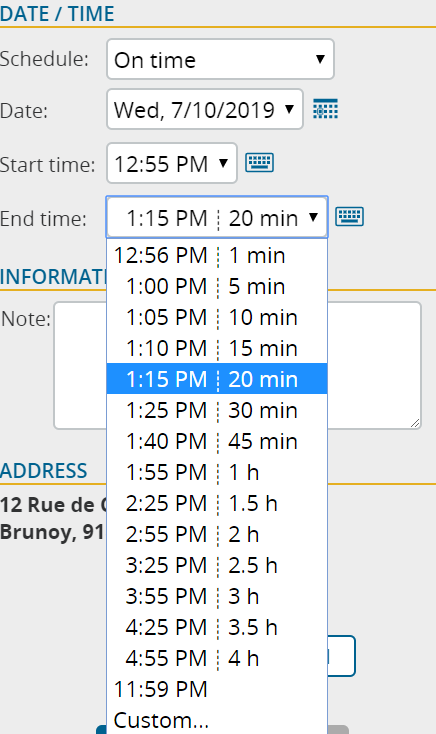
Now, there is a trick on how to skip this check. If an appointment starts at 12:00 a.m., there will be no availability check for it. Likewise, when appointments end at 11:59 p.m., no drive home is scheduled. You can now use this state of affairs to plan flights. The following example provides an explanation.

Let’s say you fly from Chicago to Miami on Monday at 5:00 p.m., to set off the next day at 7:30 a.m. from your hotel in Miami to visit customers there and in the surrounding areas. To do this, create an appointment on Monday from 5:00 p.m to 11:59 p.m. with the address of the Chicago airport. This tells portatour® that the Monday route ends at Chicago airport. You then create an appointment on Tuesday from 12:00 a.m. to 7:30 a.m. at the address of the hotel in Miami. This lets portatour® know that your route will start at the hotel on Tuesday at 7:30 a.m. No route feasibility check between these two appointments takes place, thanks to the set times of 11:59 p.m. and 12:00 a.m.

Important: To enter these special times (12:00 a.m. or 11:59 p.m.), change the “Schedule” setting in the appointment to “All-/Multiday” and then adjust the appointment’s start time and end time accordingly (see screenshot above).

Notes:

  • To create such appointments, for example, click a blank area of the desired day in the calendar and then select “at custom address” from the “New Appointment” context menu.
  • If you are staying several days in Miami, you either create several additional overnight appointments at the desired hotels or enable overnight stays in the portatour® Options. You can optionally enter your favorite hotels in the region under “My Places”, so that they are automatically scheduled.
  • For the return flight, create an appointment at Miami airport from, for example, 6:00 p.m. to 11:59 p.m. In this way, your route for the following day will begin from your home location.
  • Currently, it is not possible to book a flight in the middle of the day, whereby you would visit customers before and after the flight.