Major November 2020 Update

After an intensive development period, we have rolled out a major update of portatour® today. To read details about the new features, scroll down or use the following links:

Extensions especially for administrators of company accounts:

We wish you much success with using the new features and are looking forward to your feedback at feedback@portatour.com.

Logging of telephone calls made in lieu of visits

Now, during the Corona pandemic, many representatives have encountered some customers who may not be visited in person, whereby contact is only possible by telephone.

Such telephone calls are a forced substitute for a visit. The call interval should be reset upon conclusion. To log this in portatour® there is a new menu item By phone instead of in person, when you click New report on the customer detail page.

Now what are the differences compared to the normal call report? The report is of type “Other” with the subject “By phone instead of in person”. In addition, this report does not affect the departure point if the schedule is subsequently updated.

Analogous to the normal call report, the date of the last visit is updated for the customer, i.e. the call interval is reset. This telephone call has taken place in lieu of an in-person visit.

Here is a table summarizing the characteristics of the different reports:

Call Missed By phone instead of in person By phone Other
Report type Call Missed Other Other Other
Prefilled subject “Call” “Missed” “By phone instead of in person” “By phone” (empty)
Date of last call at customer Will be updated Remains unchanged Will be updated Remains unchanged Remains unchanged
Departure point for next schedule Will be updated if necessary Will be updated if necessary Remains unchanged Remains unchanged Remains unchanged
Geotag Possible Possible Not possible Not possible Not possible

Note: Which menu items are actually visible depends on the settings in the Options under “Reporting”.

Export data of all user accounts at once

To export the data of all user accounts, you used to have to log in to each user account individually and export from there, or use the API. This process is now much easier with this update.

Here’s how it works:

  1. Open the Options as administrator or supervisor.
  2. Click Export data in the company-wide section Data management .
  3. Select from the menu which data you want to export (Customers, Appointments, Tasks, Reports, Users).
  4. If you have user groups, select whether you want to export the data of all users or only of a specific user group.
  5. If necessary, change further export settings (Format, Time period, …).
  6. Click Download .

You will now receive the data in a file as a download in your browser.

Bear in mind:

  • This process may take longer if there are a large number of users or data records. Leave the browser open during this process and remain on the page.
  • The limits for the download are 100,000 rows and 100 user accounts. If these limits are exceeded, the process is aborted. In this case, restrict the export to a user group, for example, or use our API scripts for automatic download from the individual user accounts.
  • The export functionality is not available if you use portatour® in combination with Salesforce or Dynamics CRM. Export the data directly from there.

Import data for multiple user accounts at once

To import customer data into portatour®, it was previously necessary to split the customer data: one file per representative with their respective customers. These files then had to be uploaded individually. Fortunately this is no longer the case.

As of this update, it is now also possible to upload a single file with all customers of all representatives. The only important thing is for the file to contain a separate column for each customer with the corresponding representative – either an e-mail address or employee number.

Here’s how it works:

  1. Open the Options as administrator or supervisor.
  2. Click Import data in the company-wide section Data management .
  3. Select from the menu which data you want to import (Customers, Appointments, Tasks, Reports).
  4. Follow the steps in the import wizard, which you already know from importing data for an individual user (see the online help for more information). If you have already saved an import configuration, you can use it now.
  5. On the new User Assignment page, select whether to assign customers to users by email or employee number. Note: if you use employee numbers, make sure that they are saved correctly for the individual users in the portatour® User Management.
  6. On the new page User Selection check that the users found and the number of rows to be imported are correct.
    • If the assignment did not produce the desired result, check the correct spelling of the e-mail addresses or preciseness of employee numbers both in the import file and the User Management.
    • You will also receive a message if there are no rows in your import file corresponding to users in portatour®.
  7. Uncheck the Import checkbox for those users you wish to exclude from the import.
  8. Follow the steps of the import wizard that you are already familiar with.
  9. You will now see the preview for the first user. Check this in the usual manner.
  10. Decide how you wish to proceed:
    • Click Back if you encounter problems in the preview and want to make changes to the settings.
    • Click Import once the preview is correct and you are ready to import the data for this user. You will see the result of the import for this user in a summary. The preview for the next user follows.
    • Click Skip if you do not wish to execute the import for this user and to continue with the preview of the next user.
    • Click Import all users if you want to perform the import for all other users as well without checking the preview per user.
      • Tip: use this option only once you have thoroughly checked that the data and settings are correct for several users having imported them.
  1. After the last user, you will see an overall summary. There you can also download the import configuration.

Bear in mind:

  • When you upload an Excel or ODS file, all rows must be on a single spreadsheet. The assignment of customers to users must be made by means of a column (e-mail address or employee number) as described above, and not by means of separate worksheets.
  • The limits for the import are 100,000 rows and 100 user accounts. If these limits are exceeded, the process is aborted. In this case, manually split the import file into several files. Alternatively use our API scripts for automatic splitting and uploading.
  • A company-wide restore point is created for all user accounts before the import process. If the import process produces an unexpected result, for example due to an incorrect import file or incorrect field mapping, revert to this restore point, either company-wide for all users or for individually-affected user accounts. Bear in mind that any data entered by users in the meantime will be lost.
  • The import functionality is not available if you use portatour® in combination with Salesforce or Dynamics CRM. The data is automatically synchronized from there.

Filtering when importing data for a user account

To import the customer data for a user, the import file could previously only contain the customers for said user.

As of this update, the import wizard allows filtering by e-mail address or employee number. This means that the import file may also contain customers of other representatives provided there is a column with an e-mail address or employee number.

To do this, after uploading the import file in the import wizard, change the setting on the new Filtering page to indicate that the file contains data for multiple users instead of exclusively for me (= the affected user).

Then select whether the filtering should be done by email or by employee number, and which column of the import file contains the user identifiers.

Note: Alternatively, you can also use the new company-wide import and leave only the user for whom you actually want to import data checked in the user selection.

Manage saved searches centrally

With saved searches, each user can filter or sort their customer list differently depending on the purpose, and subsequently call them up again at any time at the push of a button.

As of this update, administrators can now create saved searches centrally, which can be employed by all users.

Here’s how it works:

    1. If you are an administrator and do not have customers of your own, first log in to a user account that has customers.
    2. Navigate to the customer list.
    3. Use the Advanced search to set the desired filters and sorting.
    4. Click Saved.
  1. Click Save search organization-wide…
  2. Enter a name.
  3. Click Save.

This saved search is now available to all users.

Bear in mind:

  • Only administrators can create and delete organization-wide saved searches.
  • This functionality is available not only for the customer list but also for all other lists, i.e. also for appointments, tasks, reports and users. Just click the “Search” icon above the respective list.

Translate custom fields and saved searches into other languages

Do you have users with different languages in your portatour® company account? Do you use custom fields? Then you will be thrilled with this functional extension: you can now translate these fields into other languages.

Here’s how it works:

  1. As administrator, open the Options.
  2. Click Translations in the Data Management section.
  3. In the menu, select the language for which you want to enter translations.
  4. You will now see an alphabetically sorted list with all names, values and descriptions of your custom fields. In addition, the names of organization-wide searches are also included.
  5. Enter the translations in the respective language. Leave translations blank if you want to continue using the original text.
  6. Click Save.

Users with the respective language will then see the translated texts in portatour®.

Bear in mind:

  • The modification of an original text causes its translations to be discarded. As such do not forget to add translations when you make changes to custom fields. You will be reminded when you save the custom fields.
  • When you translate the values of selection fields, saved searches based on those field values might not work. For organization-wide saved searches, use the key of the selection field value by employing an “equals” search filter. In users’ saved searches, we recommend using the translation of the selection field values in the user’s language.
  • The translations of field names are also used in the column headings when exporting data. Take this into account when you process exported files in other systems.
  • The translation functionality is not available if you use portatour® in combination with Salesforce or Dynamics CRM. The translated field names are obtained from there.

New Maps October 2020

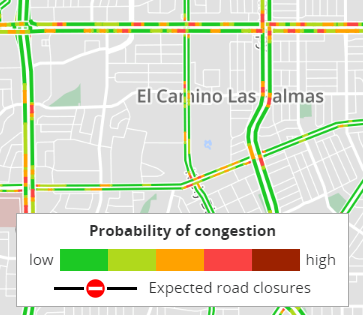
Today we have updated the map data and traffic flow data on our servers.

Changes in the road network and driving speeds may affect driving times between customers, so we recalculated them for you in portatour®. Some users might notice the change when updating the schedule next time.

In addition, when displaying maps in portatour®, the loading times might take a little longer since the map details need to be downloaded to your device again.

New Maps May 2020

Today we have updated the map data and traffic flow data on our servers.

Changes in the road network and driving speeds may affect driving times between customers, so we recalculated them for you in portatour®. Some users might notice the change when updating the schedule next time.

In addition, when displaying maps in portatour®, the loading times might take a little longer since the map details need to be downloaded to your device again.

Improved Online Help

As of today, new and improved online help for portatour® is available.
Click the question mark symbol in the main menu bar or in the pop-up windows of the portatour® application to open the new online help. Alternatively you can also navigate to help.portatour.com directly.

More content

  • Online help for browsing and searching
  • Video Tutorials
  • Frequently asked questions and their answers
  • Manual as PDF download
  • Contact Support

Improved search

Using the new search function, you can quickly find the articles or videos in the online help that are relevant for you. Simply type in the search terms and the results will immediately appear, sorted by relevance.

New design

We have given the online help a fresh coat of paint. Both functionality and user-friendliness have been improved.

Improved usage on smartphones and tablets

The online help is also now easier to use on smartphones and tablets while on the move.

Content provided according to your product variant and authorization level

In the menu (next to Help Center For), select your portatour® product variant (Anywhere, Salesforce, Dynamics CRM, etc.) and your authorization level (user or administrator).

More languages

The range of languages has been extended. In addition to English, German and French, the portatour® Anywhere online help is now also available and updated in Italian, Spanish and Portuguese. When no translation is available, the English version is displayed.

Your feedback

We are constantly working on improving the online help and adding new content. If you have any comments, please send them to feedback@portatour.com You will also find a feedback section under the individual articles. Please let us know whether an article was helpful or what we can improve. Of course we are also happy to receive positive feedback.

We wish you much success with the new online help!